How it works
Artwork in. A link out.
The three steps behind a MerchMaker mockup: choose a real supplier product and artwork, place the decoration on it, and publish the result as one link.
Step 1 of 3
Say it
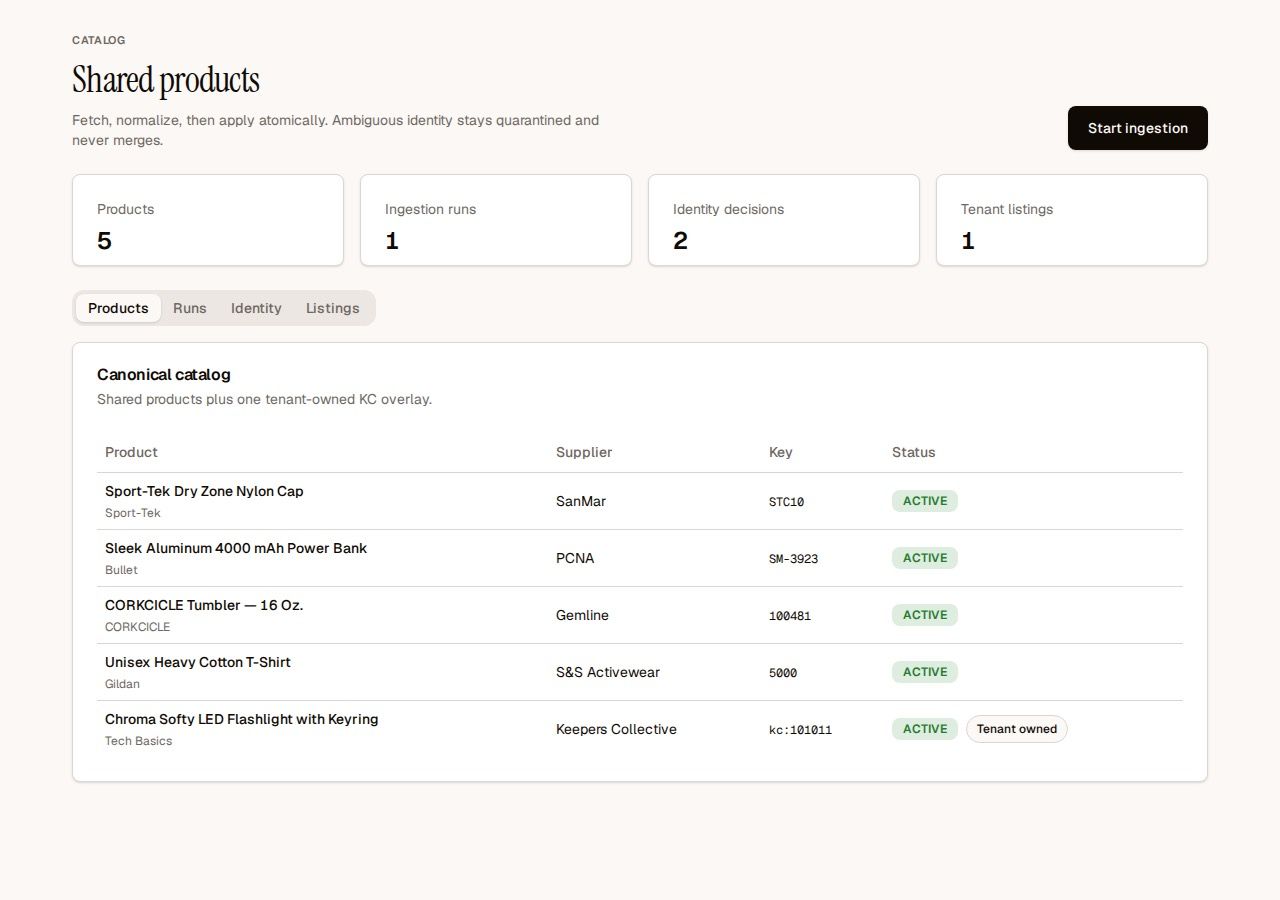
Upload the client's artwork and pick the blank you want it on. The catalog is real supplier data — the same products, keys and imprint areas your suppliers publish — so the thing you choose is a thing you can actually order.
- Artwork is uploaded once and addressed by version and digest. Re-running a mockup six weeks later uses the file you approved, not whatever is in the folder now.
- The catalog is ingested from supplier feeds and normalised; products whose identity is ambiguous are quarantined instead of being merged into the wrong line.
- Nothing here places an order or checks inventory. This step is choosing what the mockup is of.
Placeholder
Step 2 of 3
Nudge it
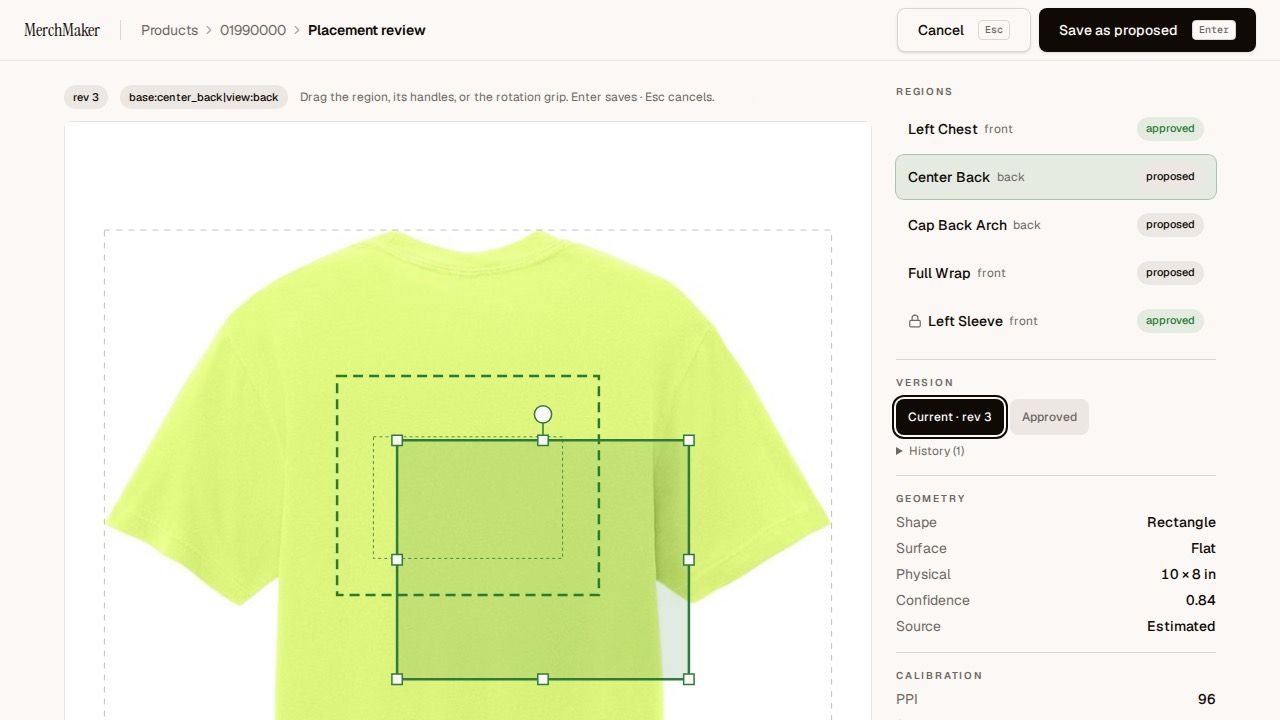
Move the decoration, resize it, rotate it, or swap the blank for another colourway. Every change re-renders against that product's own photograph, so what you are adjusting is the mockup itself rather than a sketch of one.
- A placement is stored product-relative — as a fraction of the product's own bounding box — so it maps onto the next photograph of that product without being re-drawn.
- Approved placements are locked. A later automated pass can propose a change, but it cannot overwrite a decision a person made.
- Physical size is carried in inches alongside the pixels, which is what lets the imprint be checked against what the supplier will actually print.
Placeholder
Placeholder
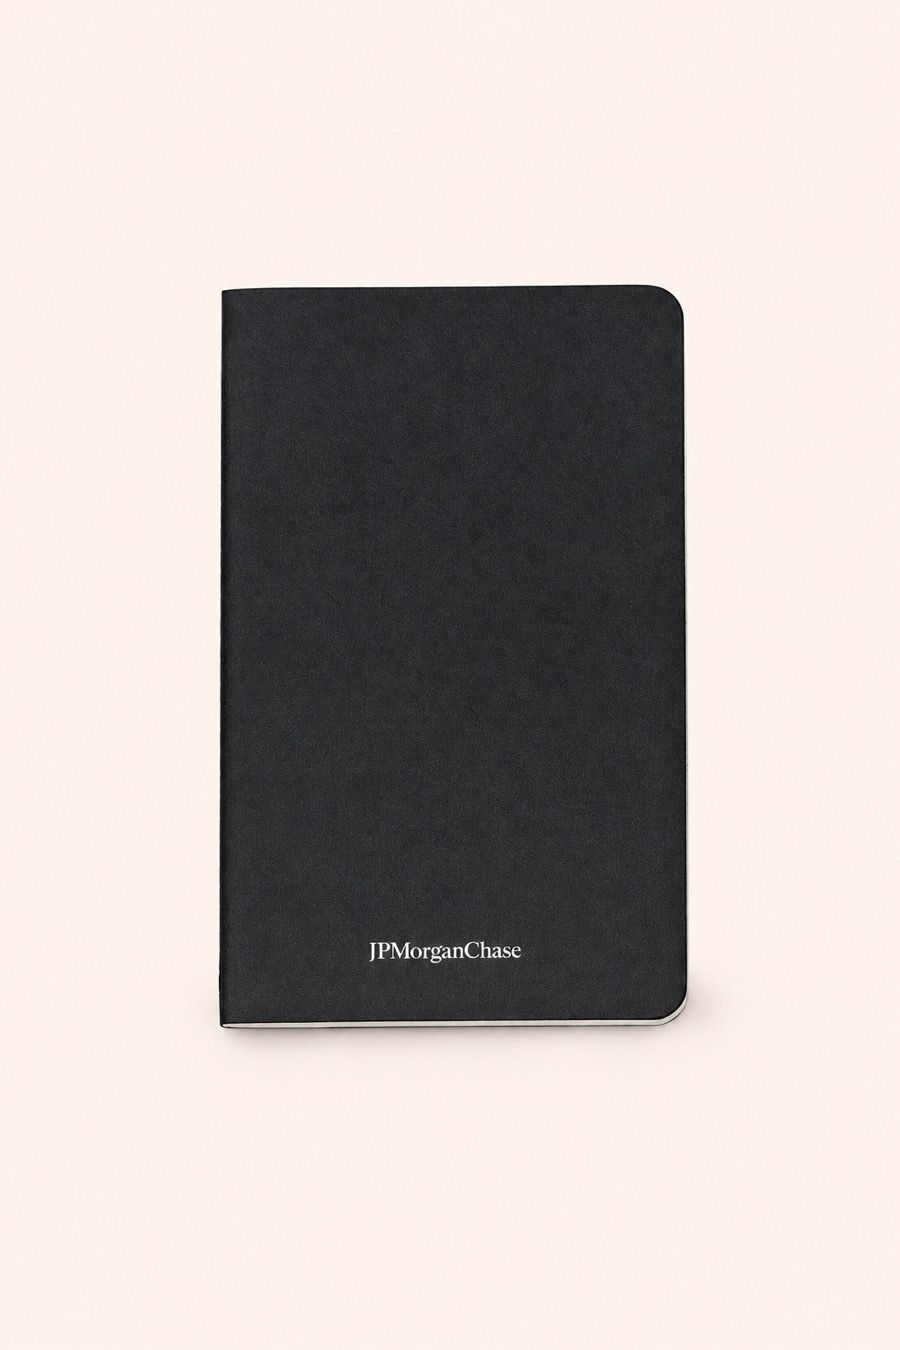
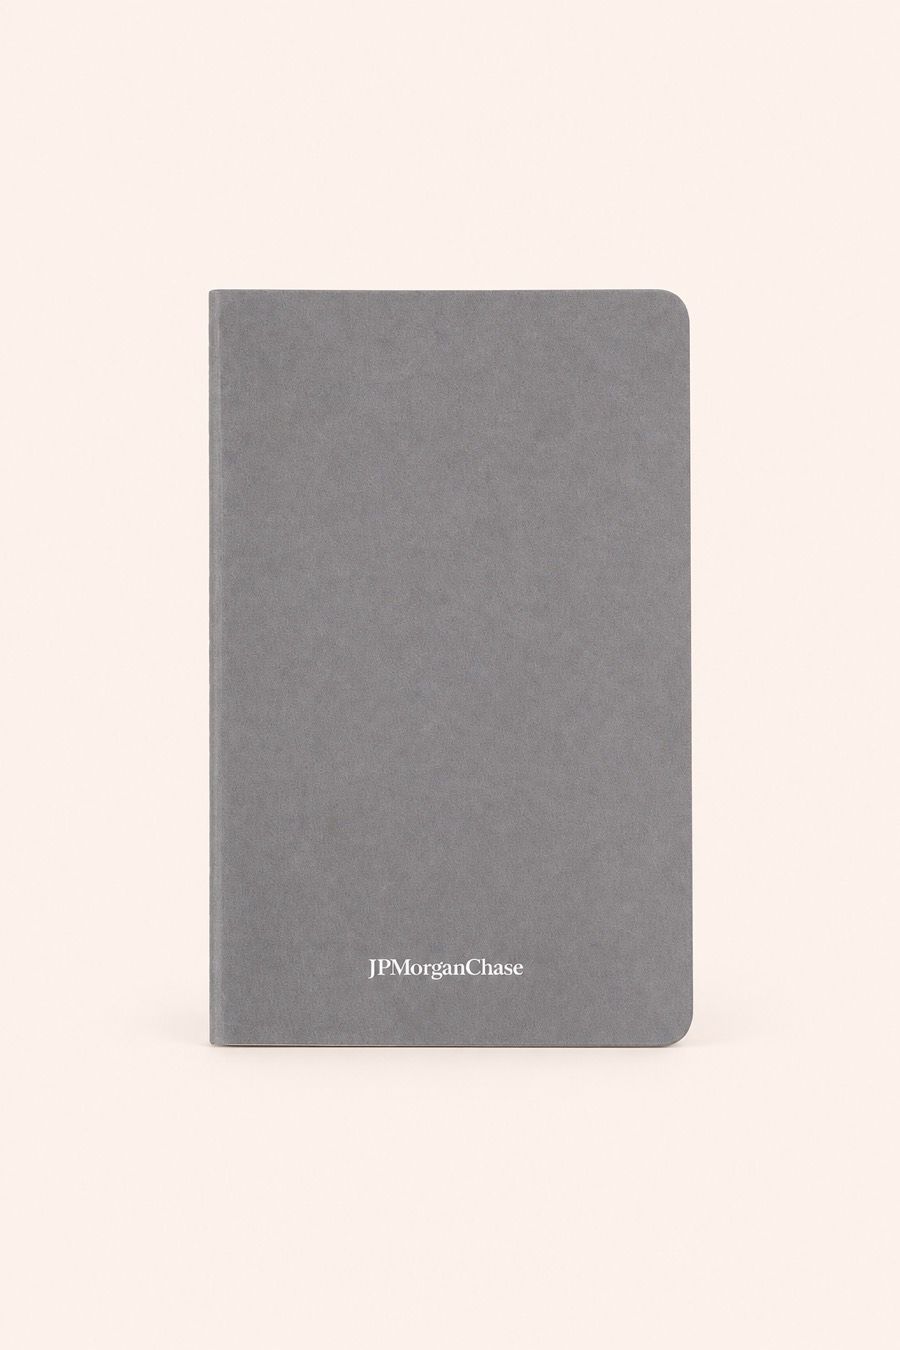
The same artwork on two blanks. Neither picture is a recolour of the other.
Step 3 of 3
Ship it or shop it
Publish the set as one link. Send it for reactions and the page collects them; open it for ordering and the same page takes card payment, with the supplier's real minimums stated before anyone pays.
- A collection freezes what it publishes — artwork, placement, method and SKUs together — so the page cannot drift underneath a client who is still looking at it.
- Feedback links expose no cart at all. That is the mode to send before anything is priced.
- Minimums come from the supplier record for that product. They are shown on the page, not discovered at checkout.
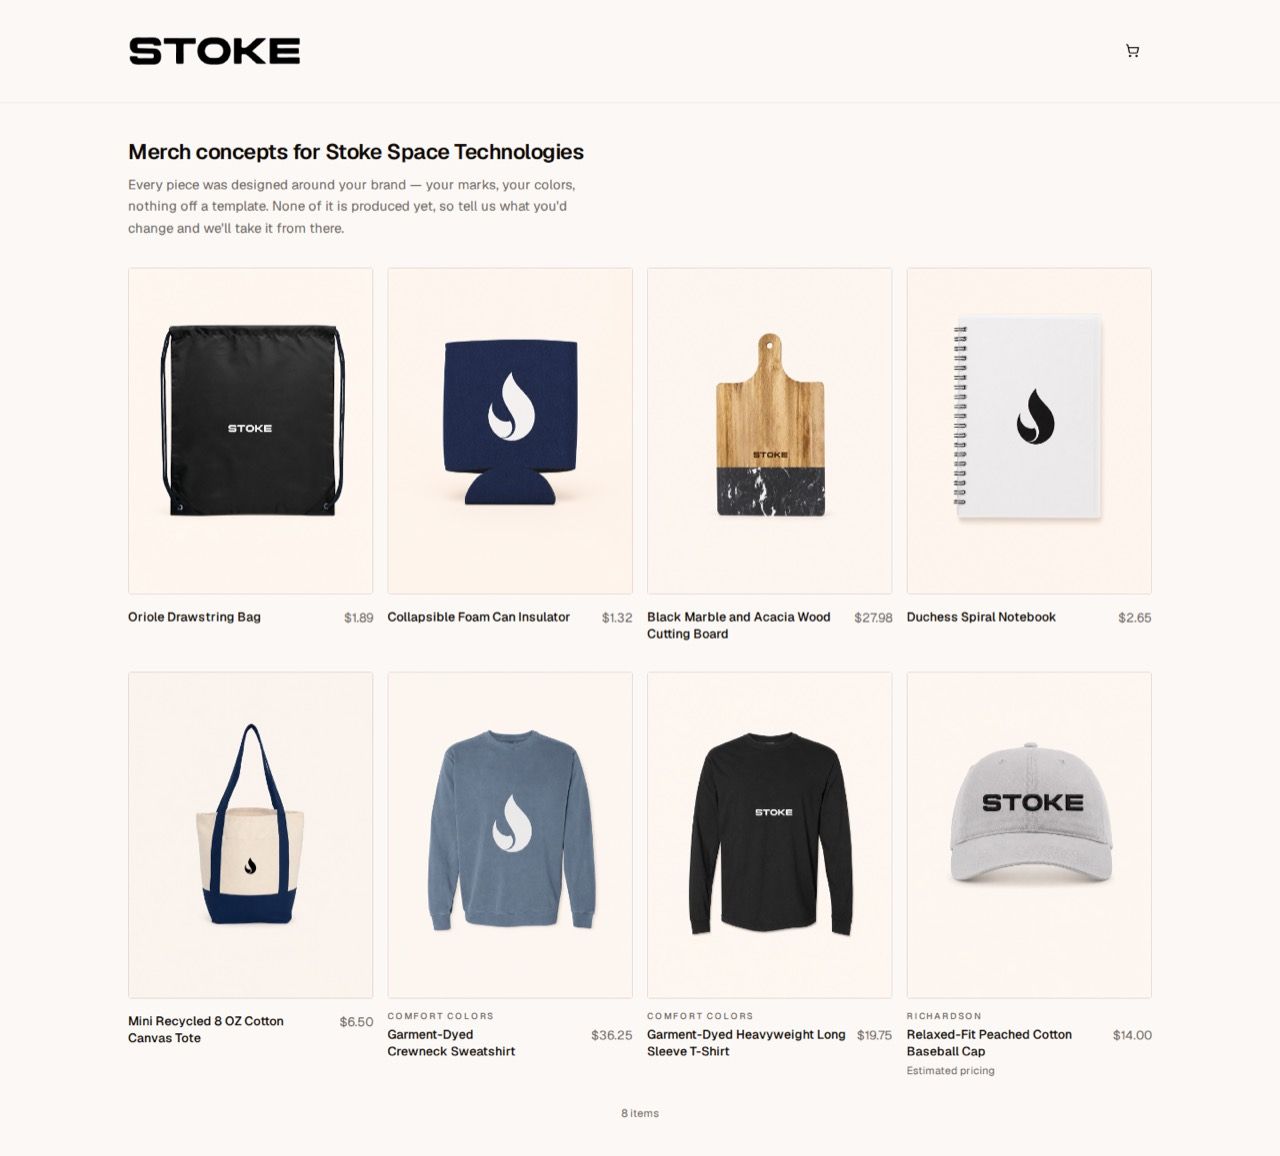
Placeholder
What this is not
Not a production proof. A mockup shows a client what a piece will look like. Sign-off for manufacturing still happens with your decorator, against their proof.
Not an inventory check. Nothing in the first two steps reserves stock. Availability is settled when the order is placed with the supplier.
Not self-serve yet. Access is by invitation while the catalog is onboarded tenant by tenant. Book a demo and we will set yours up.
Run one of your own jobs through it.
Bring a client's artwork and the products you would quote them. We will build the mockups on the call.